Hello again, friends!
I’m back with a new make-up tutorial for you that you’ll absolutely love! This is the routine I personally like to use for big events like dates, weddings, or parties. Let’s begin!
First, these are all the products I used:

Step 1: Priming the canvas
Priming your face and eyelids has many benefits. It not only helps your make-up go on smoothly, it also helps the make-up stay on longer and helps control oil. Also, most types have SPF, so that’s just an added bonus!
I wear eye primer every day that I wear eye shadow. I don’t use foundation primer during my every day make-up routine, but whenever I need to look really nice for a long time, there’s nothing better.
I use Mary Kay’s foundation primer:

And Mary Kay’s eye primer.

We’re best friends.
Step 2: It’s face time!
I don’t always start with my face when I do make-up, sometimes I start with my eyes. It just depends on how I’m feeling. Let’s do face first today.
I started with a tinted moisturizer because it makes my face look fresh, and it works as a nice light-coverage foundation.
I just LOVE Mary Kay’s tinted moisturizer. (It also has SPF, so my skin is nice and protected. With all the SPF I use daily, I should look 25 when I’m 60!)
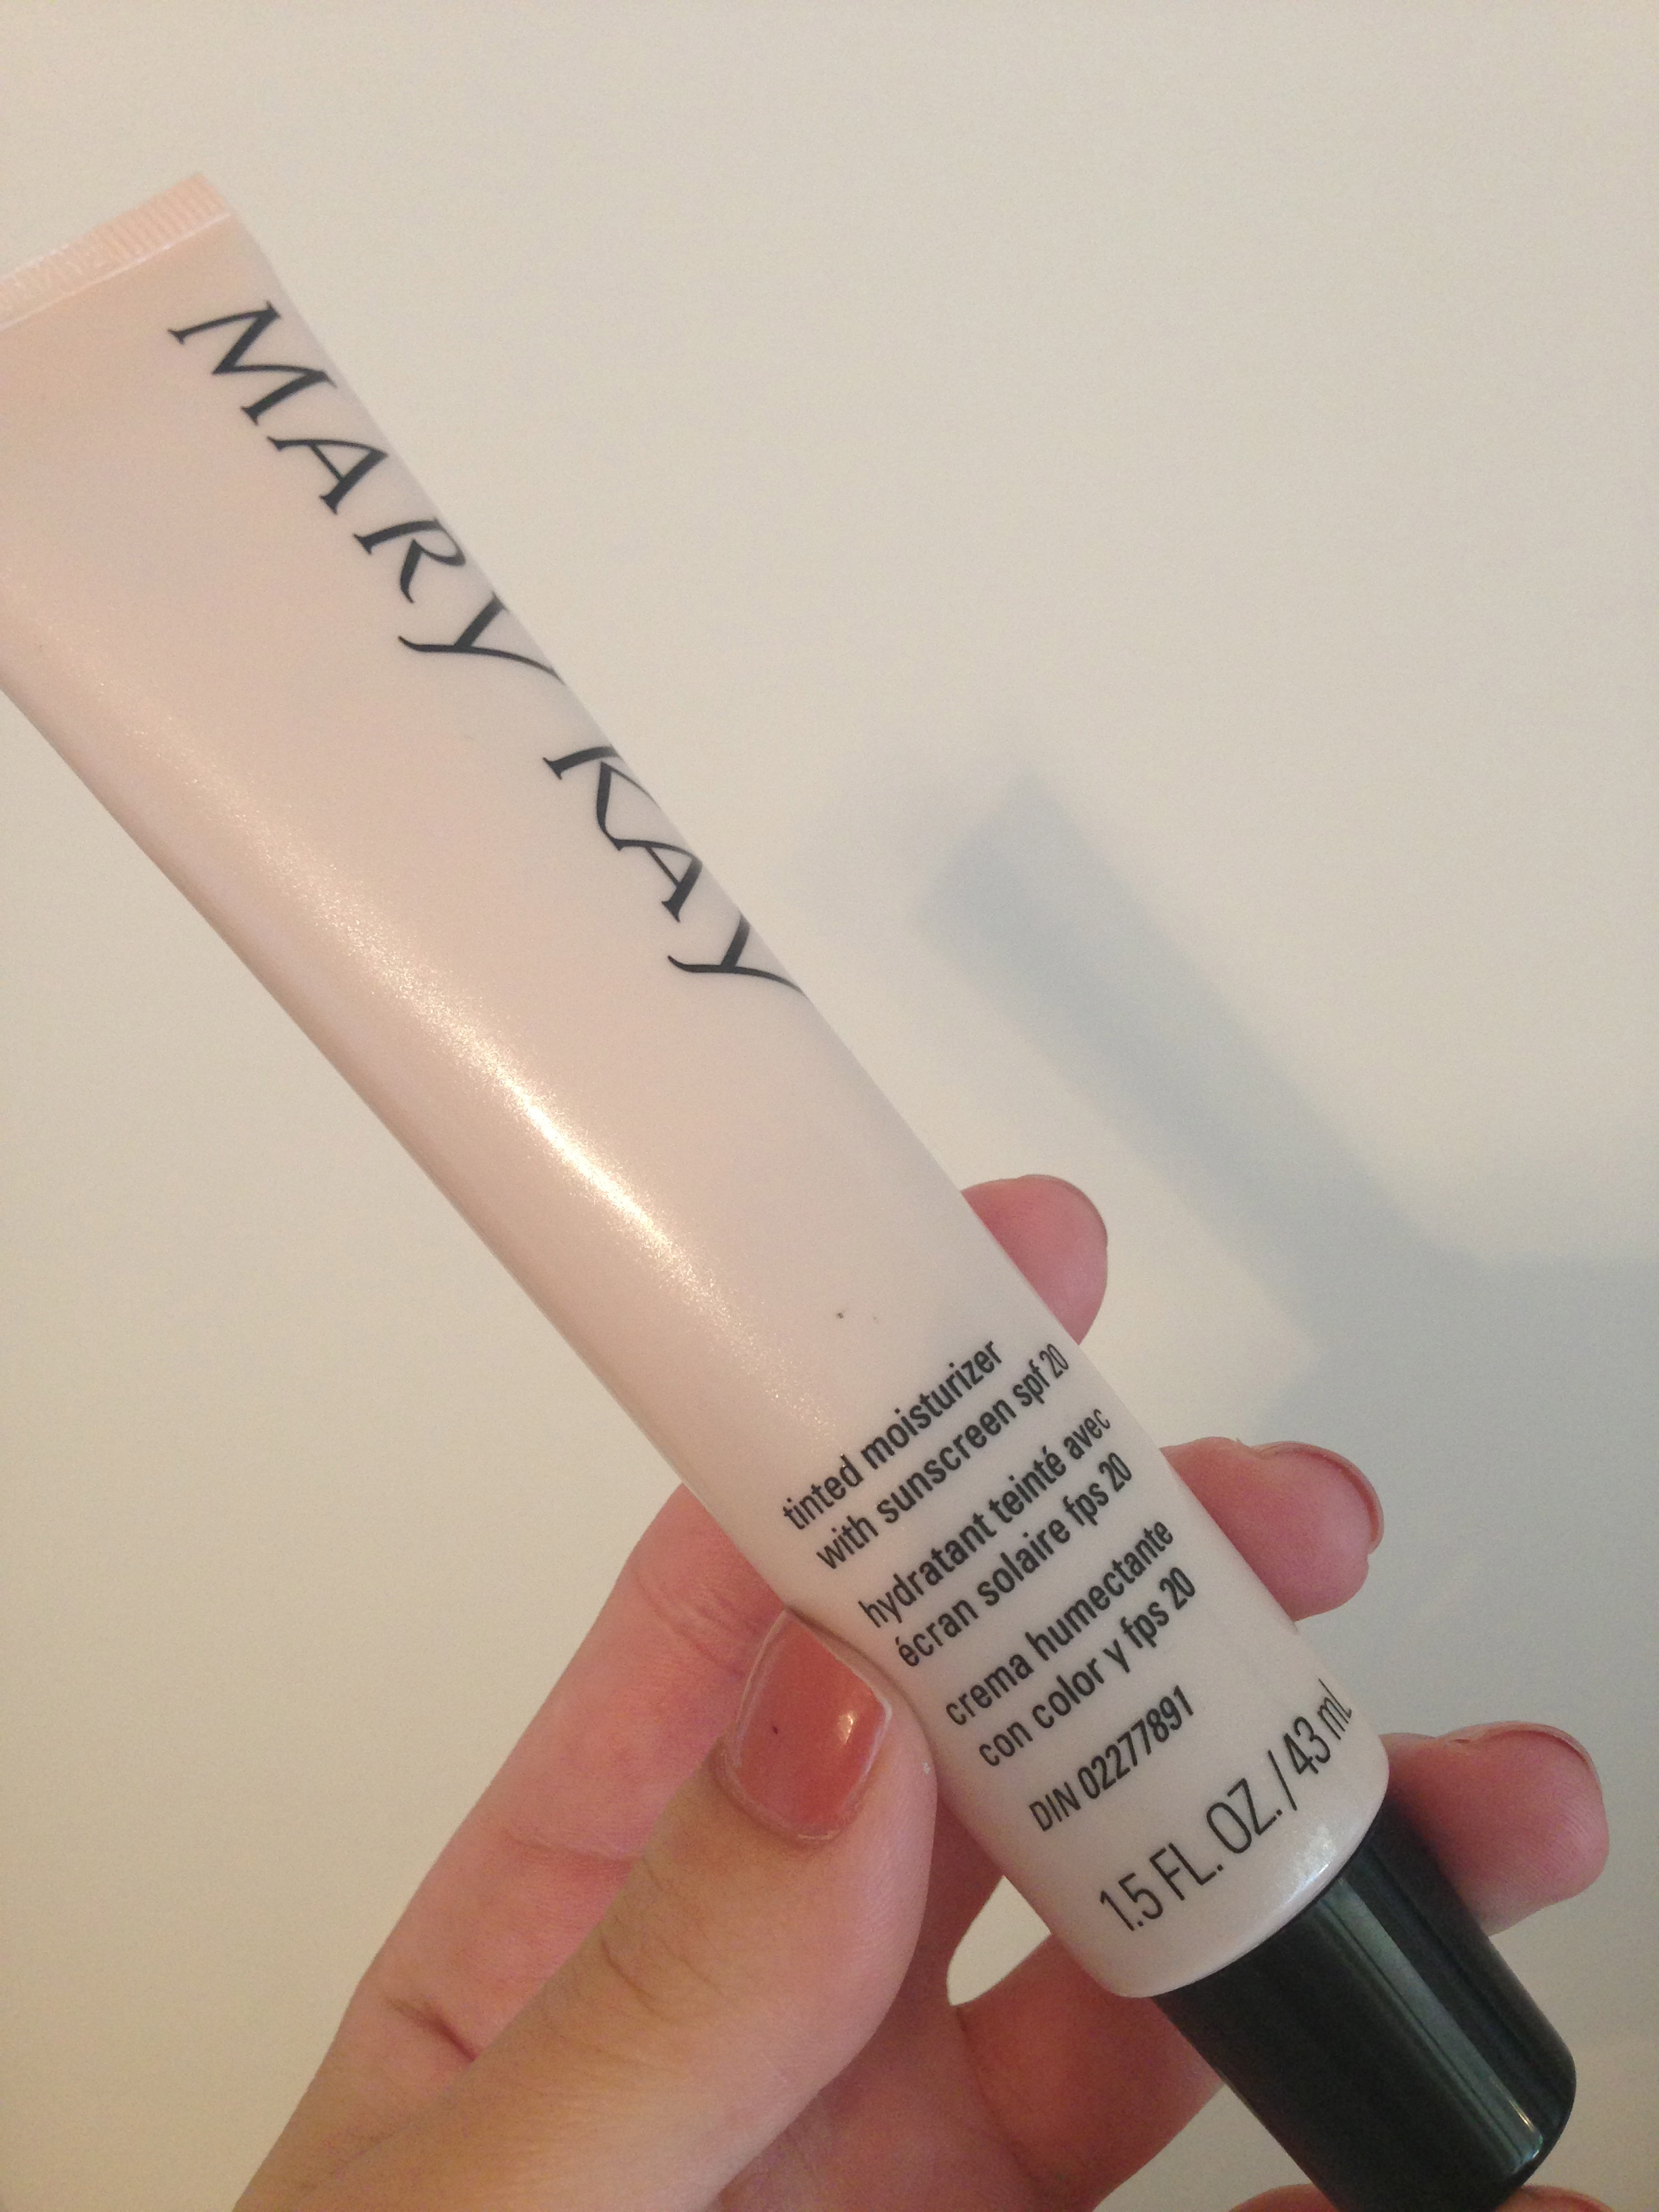
On most days, tinted moisturizer is enough for me. However, when I am going somewhere extra fancy, I like to top off my face with a bit of…
mineral powder foundation! I love Mary Kay’s.

I like to use powder foundation because it gets rid of shiny oily spots, and it makes my face look a bit more airbrushed. It’s not necessary everyday because using a lot of it on top of tinted moisturizer would clog my pores. However, it adds a nice touch. I use a powder brush to apply it:

Application tip: Don’t just dip your brush straight in the powder and apply it to your face. That will get very messy and give you uneven coverage. Instead, tap some powder out into the lid…

and dip your brush into the powder that is in the lid. Tap off excess powder from the brush…

Then buff the powder onto your face! Remember, a little goes a long way. You don’t have to cake this stuff on. Just cover the extra oily spots and any discolorations.

Step 3: Eye love it!
Yay! It’s time for eyes! I love eyes!
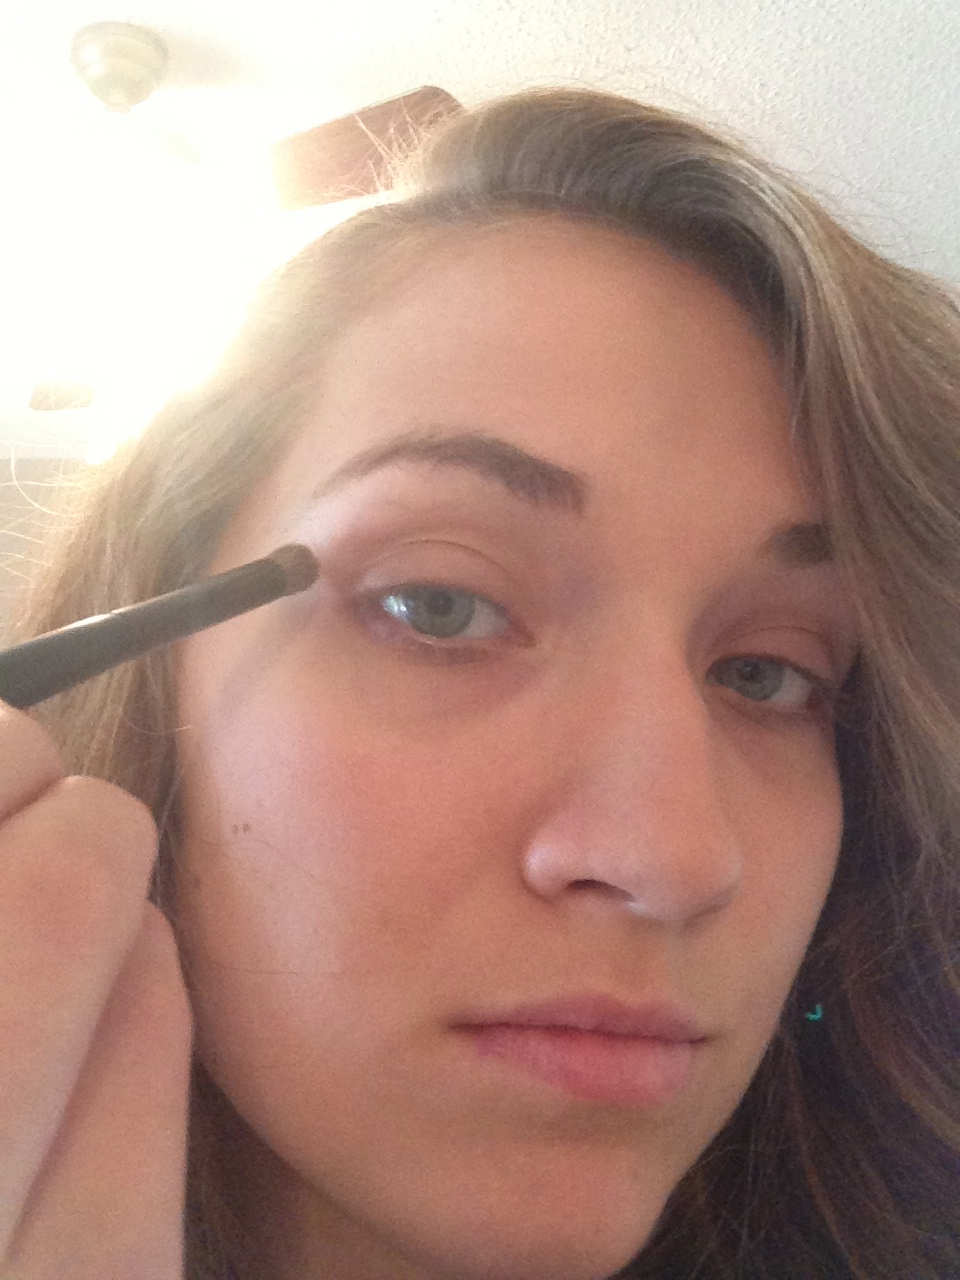
Okay, so I began with just a base color, from Mary Kay. It’s called Hazelnut:

Hazelnut
I covered my entire lid with hazelnut using the Mary Kay definition brush:
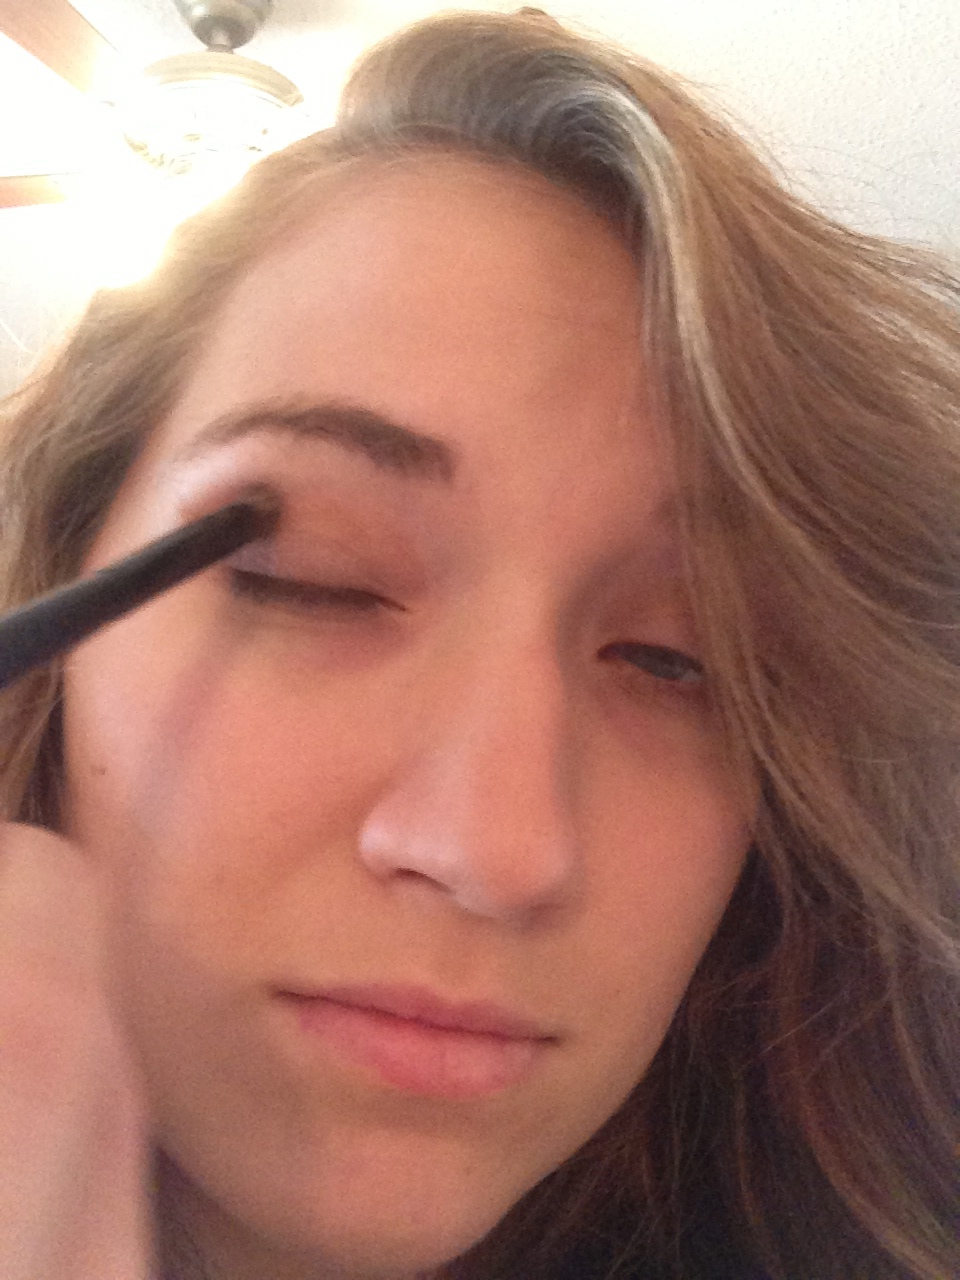
Next, I’m going to teach your a little trick of mine that will make your eyes really pop! This next color is a favorite of mine, called Cinnabar, by Mary Kay.

Cinnabar
I use this color in my crease all the time because it gives definition, but it doesn’t make me look like I have raccoon eyes. I will be using this in my crease in this tutorial, but I’m also adding a little extra step as well. I take my trusty Mary Kay angled eyeliner brush:

and dip it in the cinnabar, and begin to create a cat eye sort of look on my lid. Take a look:
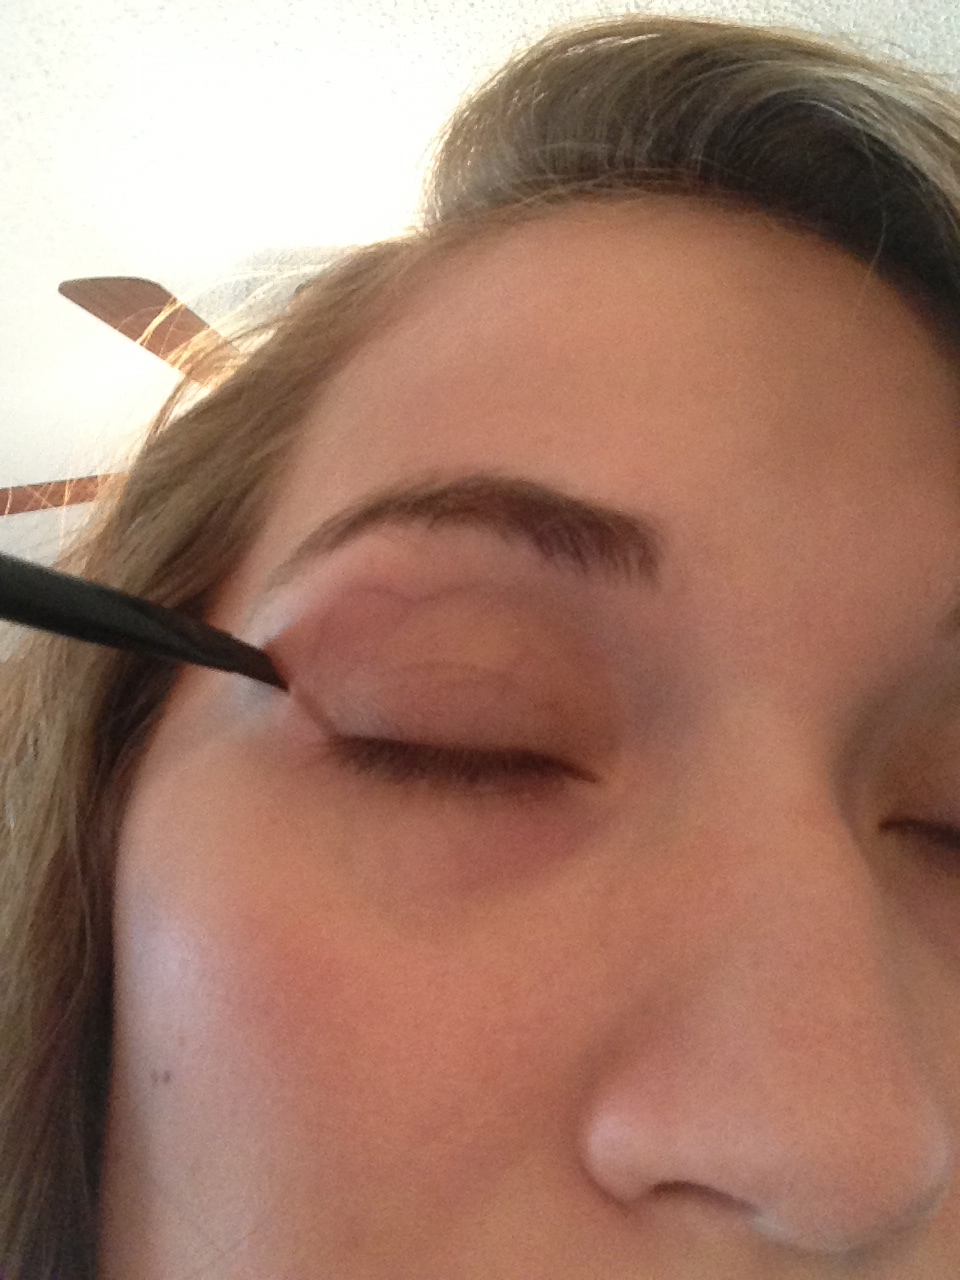
The best way to do this is to begin with your eyes open, with the liner brush on the lower lid. Draw a straight line up from the outer corner of your eye toward the outer edge of your eyebrow, stopping before you actually reach your brow. If you do this on both sides, the lines should look even.
I do this because it gives my eyes more definition and makes them look bigger in the end.
Next, I use my Mary Kay Crease brush:

I dip it in the Cinnabar, then follow the line that I created with my eyeliner brush, and connect that line with my outer crease. I’ll give a few pictures that I hope will help you understand.
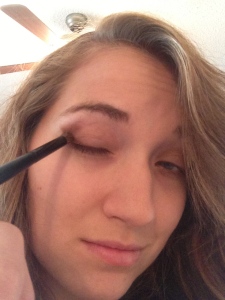
You can even use the cinnabar along your whole crease if you want, just don’t use so much toward the inner corner of your eye.

Okay. Now you’re gonna look kind of crazy, like this:

But don’t fear. I’m here to help you.
Step 4: More eye stuff.
Okay, grab your lighter eye color, I’m using Mary Kay’s Crystalline:

Crystalline
And apply it right under your eyebrows (I’m using my Mary Kay eye definer brush):

And in your inner crease.

Begin to blend all of these colors out so they don’t look so CRAZY.
Next, for extra awesomeness, I applied just a touch of Cinnabar to my lower lid:

Oh my, what a face…
And I also brought in this new color, Mary Kay’s Denim Frost:

Denim Frost
It’s a shimmery dark blue that I only use on special occasions. I just added a touch to my crease to darken it up a bit and make my blue eyes stand out.
And when you’re done, you should look like this!

Not quite finished yet, but significantly less scary, am I right?
Step 5: Time to line!
Okay, I finally figured out what this next technique is called! Tightlining!! Also known as Invisible Eyeliner, this lining technique gives your eyes an extra bit of pop without looking over done.
I usually use a stick liner for this, but I wanted to see if I could do it with my gel liner. FYI-it’s possible, but I still prefer stick liner because it’s easier and faster.
Tightlining is easy once you get the hang of it. I do it EVERY day, because it lines my eyes and still looks so natural!
This is the gel liner I’m using, which I LOVE. It’s Maybelline New York Eye Studio Gel Liner. It even comes with this handy eyeliner brush!

To tightline, all you have to do it hold your eye open with one hand, and apply the eyeliner under and between your lashes with the other. It may take some practice, but once you’ve got it, it’s going to look great!

After I’ve tightlined my eyes, it’s time to really get to work with this bad boy.
Since we’re doing a tutorial for a fancier occasion, I’m going to do a pretty thick cat eye. I just really love the way it looks.

And the best part is that in order to make your wings even, all you have to do is follow the lines you drew earlier!
And connect the upper lid to the bottom lid:
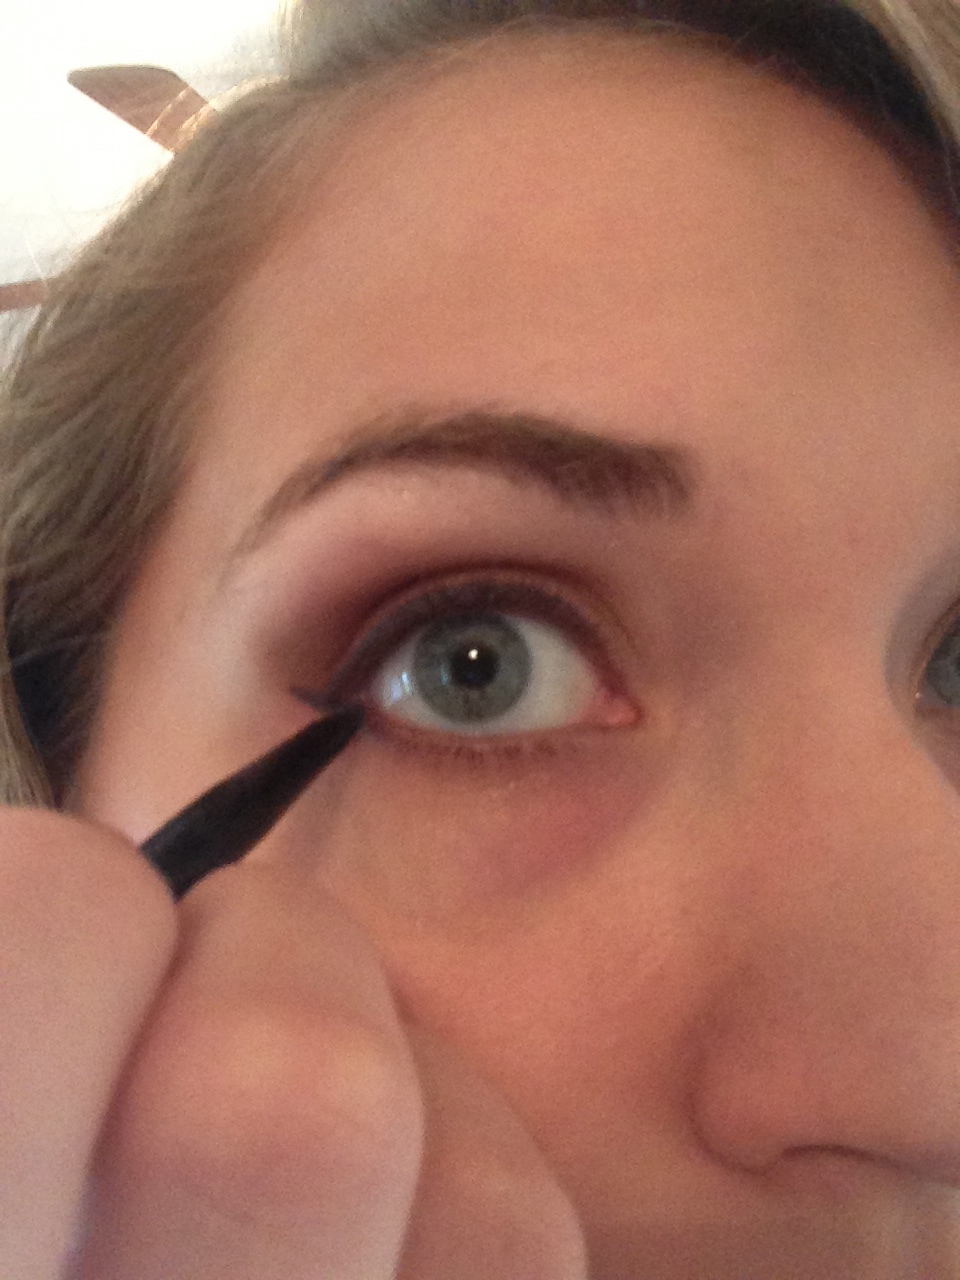
And your eyes are lined!
Step 6: La-la-la-lashes!
You don’t have to, but I like to curl my eyelashes. You can get an eyelash curler from the drug store, and they’re pretty inexpensive.
Remember: Curl your lashes BEFORE applying mascara!

Why do eyelash curling pics always look so creepy?
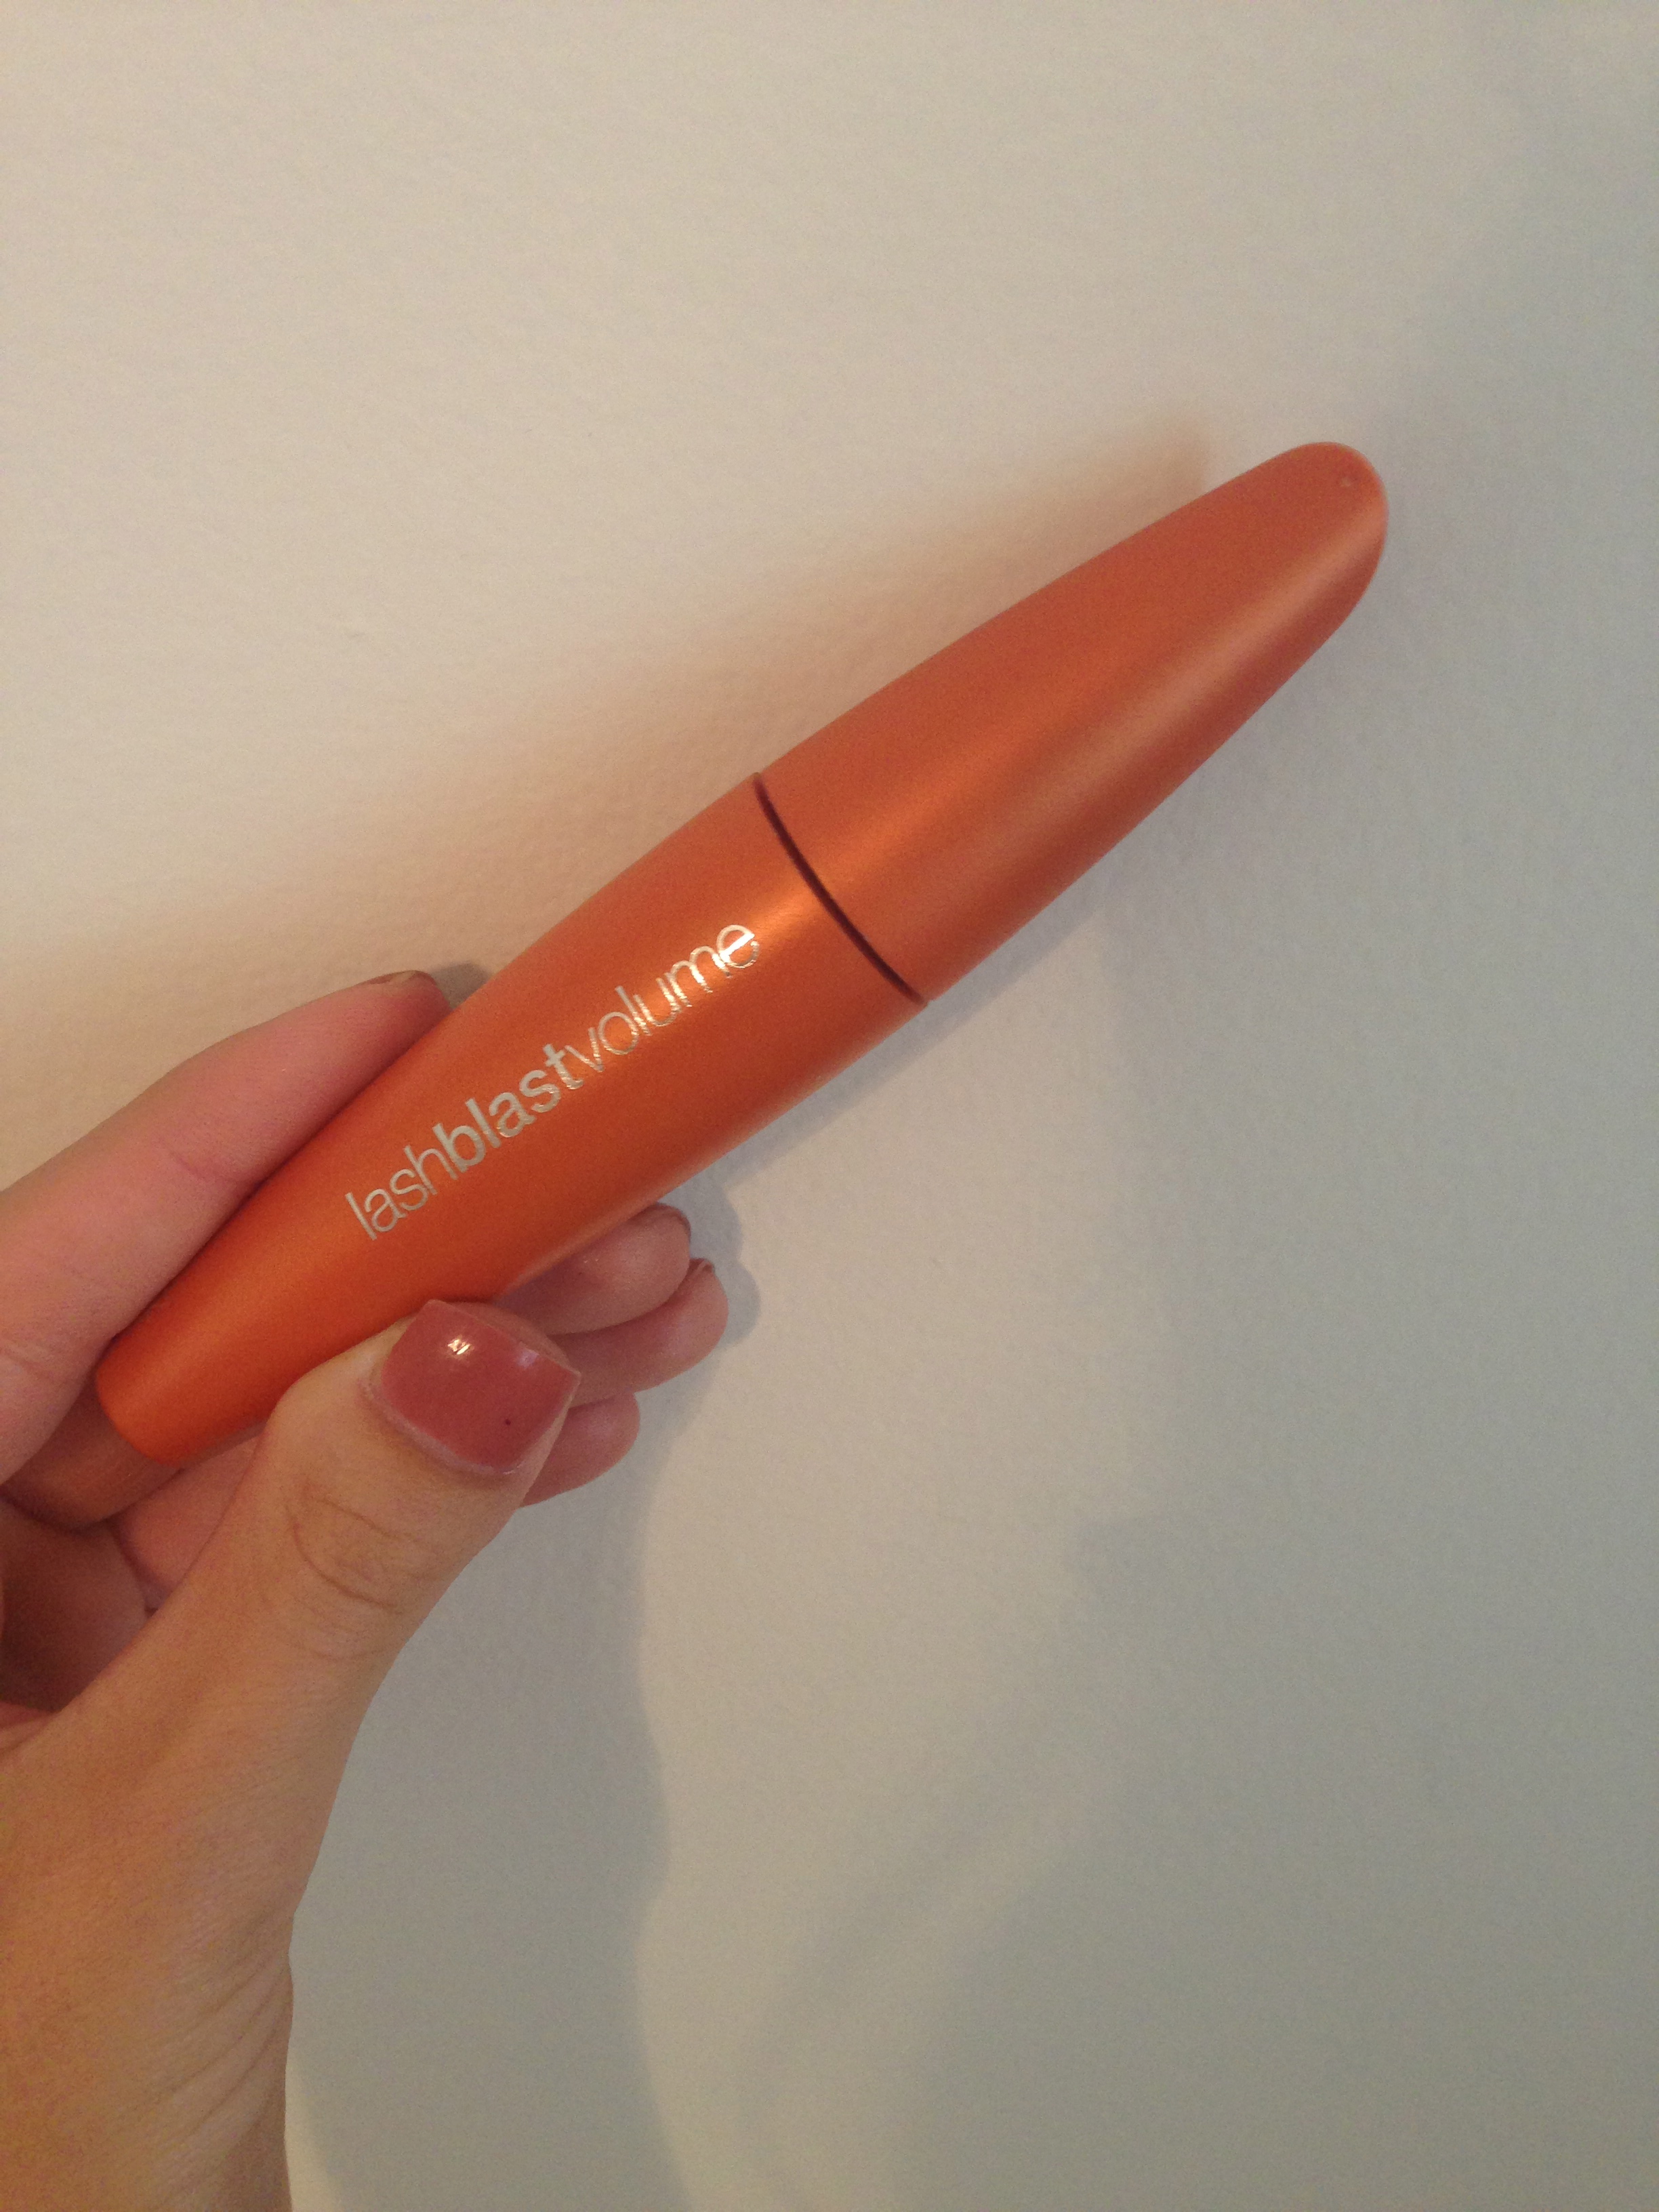
This is the mascara I used for this tutorial:
I’m assuming you know how to apply mascara. I’m not even sure if I do it right, but as long as I don’t have clumps, I’m happy.
Step 7: Finishing touches!
I like to apply concealer as one of my last steps. I prefer to put it on over foundation, because otherwise the foundation covers it up and there’s really no point to wearing it anyway. I use Mary Kay’s concealer:

I put a dot on my hand and use another finger to dab it around and warm it up a bit. This helps it blend easier once it’s on my face.

Then I apply the concealer to my under eyes, where my perpetual dark circles live.

Make sure that you blend the concealer in VERY well. Since it’s on top, it’s pretty easy to spot if you don’t blend it thoroughly.
Step 7: Are you blushing?
Use an angled blush brush like this one:

Apply a light shade of blush. Make sure that the color you choose isn’t very bright. If you go for a very extreme color, you’ll either look like a clown or a prostitute. I prefer to look like neither, so…
I use Mary Kay’s Strawberry Cream:

Strawberry Cream
Remember, go LIGHT. At the stage in the tutorial, less is more. You could even go without blush and look just gorgeous!
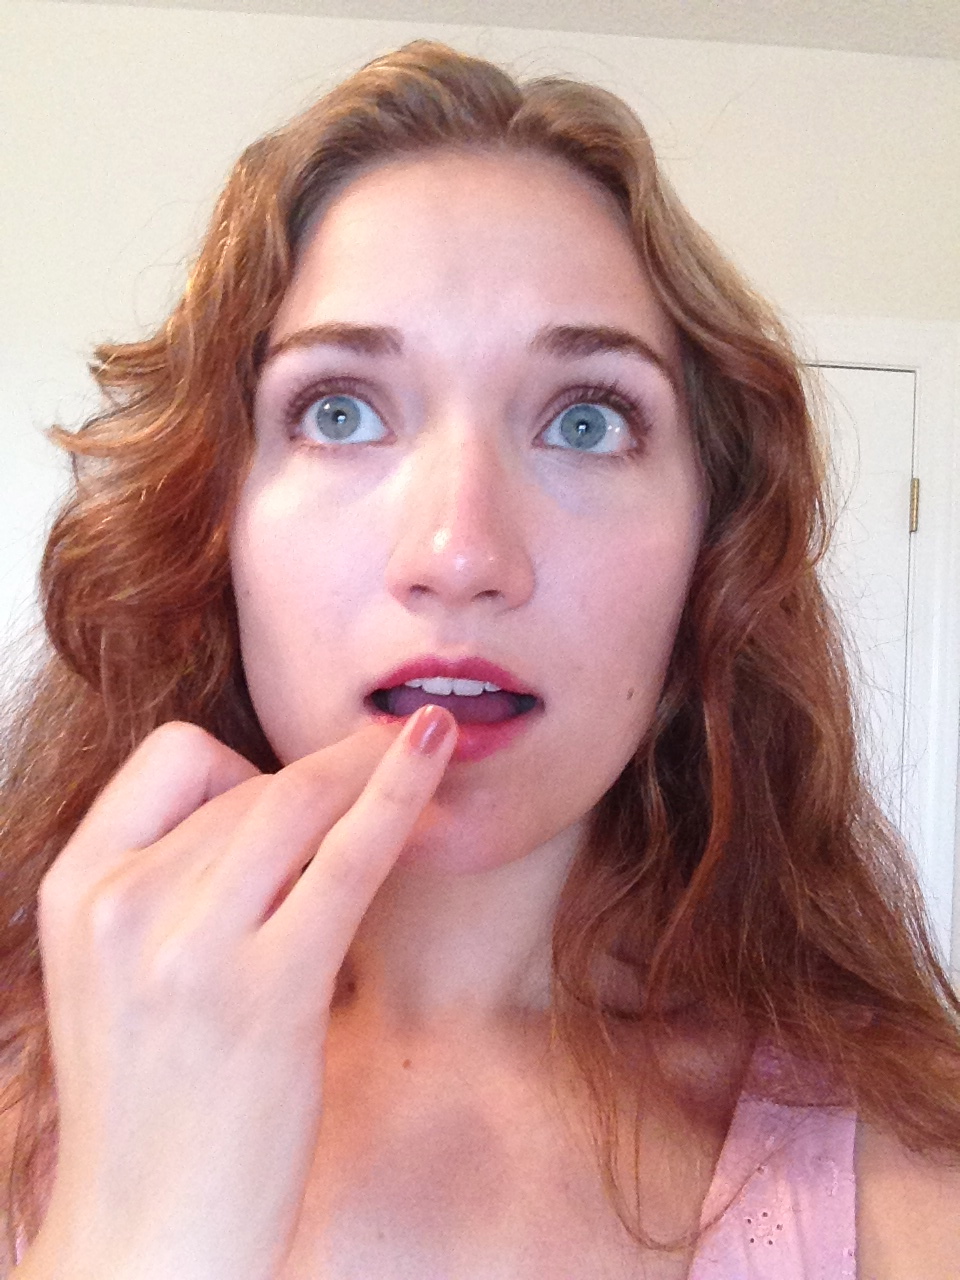
If you feel that you simply must wear something on your lips, go for a light pink tinted lip balm or a light pink/clear lip gloss. Just make sure you downplay the lips. It’s all about the eyes on this one, baby.
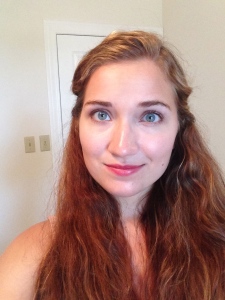
Ready for the finished product?
Here are the eyes:
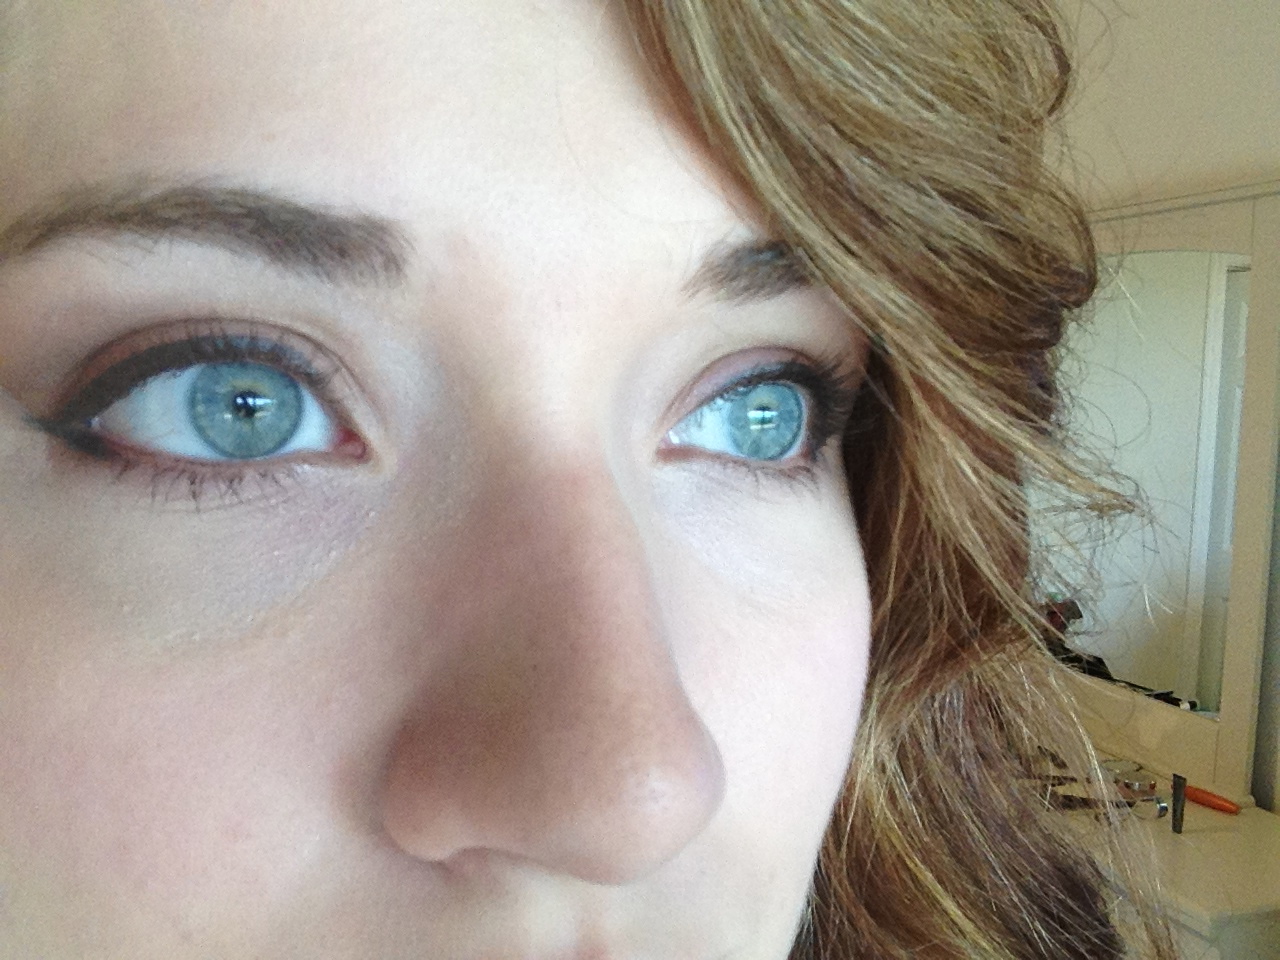
Pensive eyes.

And the full face:

Voila!
I hope you guys find this tutorial useful! If you have any suggestions or questions, leave a comment! I’d love to hear from you!
With Love ❤
Hebrews 11:1